
Add a little bit of glamour to your games.
For today we’ll be going over one of my hobby articles, namely my custom terrain hexes. You might have seen them at events or on the internet but today I’ll reveal how I came about making them and how you can too.
Now why even make them in the first place? While it is true that the game already has blocked hexes clearly marked on boards, I like to just make them a bit more visible as well as add my own hobby touch to games. It’s just that little extra touch and as someone with an extensive background in tabletop gaming, a part of the hobby I love to do.
When going about it I had 2 mains goals: they had to be cheap and easily transportable while still visible. I’ve seen impressive pieces on the internet but I didn’t want huge terrain that obscured the game while also wanting something affordable as you see a lot of sets going for around £30.
After a bit of research I set out on using the following materials:
Custom laser cut MDF hexes – I got mine from Red Beam Design but as they are out of business you can use Counter Attack Bases instead. I went for the full set twice (2 single hexes, 2 double hexes and 2 triple hexes) so I could have doubles in case me and my opponent used the same boards. You can just buy a single set but it’s all down to your preference.
Shattered Dominion Large Base Detail Kit – This would be the stuff I use to make the terrain stand out. You can buy the whole box (great if you have an AoS army to use it on) or do what I did and just buy 2 of the frames from bit sites as the 4 sprues in the box are 2 doubles. You can get it directly from Games Workshop or any other hobby store.
Sand and Gravel – Just your standard basing materials. I first glued to the big rocks and then sand just to give the hexes a more realistic appearance. I use my own custom sand mix as well but this is just more personal preference from years of wargaming.
Glues – Another standard. I used super glue for gluing the plastic to the MDF hexes and PVA glue for the sand.
Optional Extra: Grass Tufts – Not needed but something I like to add for that extra touch to make my pieces stand out more and appear more realistic. There are tons of grass tufts out there so it’s all down to what you want to use.
From there it’s just down to the business of painting. The paints used were: Mechanicus Standard Grey, Dawnstone, Administratum Grey, Nuln Oil, Agrax Earthshade, Vallejo Blue Wash, Vallejo Model Air Stonewall Grey, Rakarath Flesh, Pallid Wych Flesh, Balthasar Gold, Retributor Armour and Stormhost Silver. That’s all the paints I used but feel free to use whatever suits your needs and preferences.
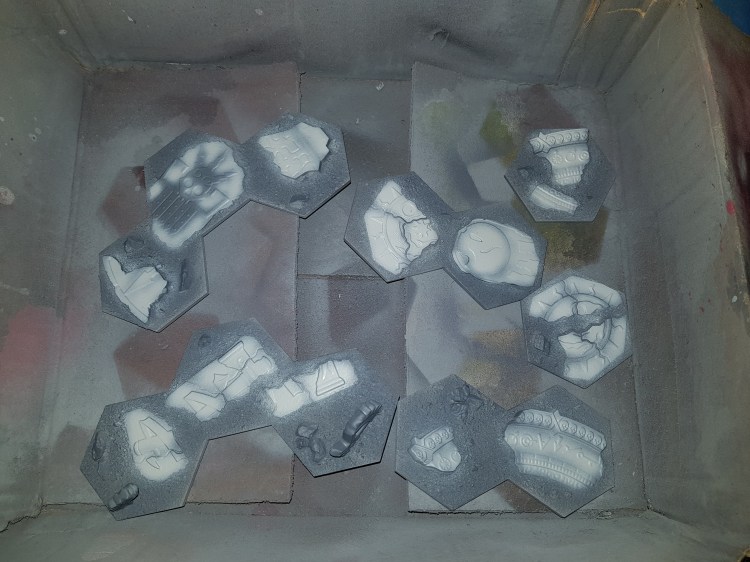
I started off undercoating my hexes with grey spray can primer. Next I airbrushed everything in Mechanicus Standard grey. I then airbrushed the plastic terrain pieces with Stonewall Grey.
After this had all dried I airbrushed everything with Nuln Oil. Then, when it had dried, I airbrushed Vallejo Blue Wash onto the sand in order to make it darker and slightly cooler as well due to the blue hue.
With the washes dry, I finished off the grey. I drybrushed Mechanicus Standard Grey, Dawnstone and then a focused drybrush of Administratum Grey on the plastic terrain pieces.
With the stone all done, it was just the details left. Brass areas where done with Balthasar Gold, gold areas with Retributor Armour and parchment areas with Rakarath Flesh. All where then washed with Agrax Earthshade and then highlighted with a dry brush of the base colours used. The gold and brass areas where highlighted with a light drybrush of Stormhost Silver and the parchment areas where lightly edge highlighted with Pallid Wych Flesh.
With the painting all done I added some grass tufts and here is the finished product:
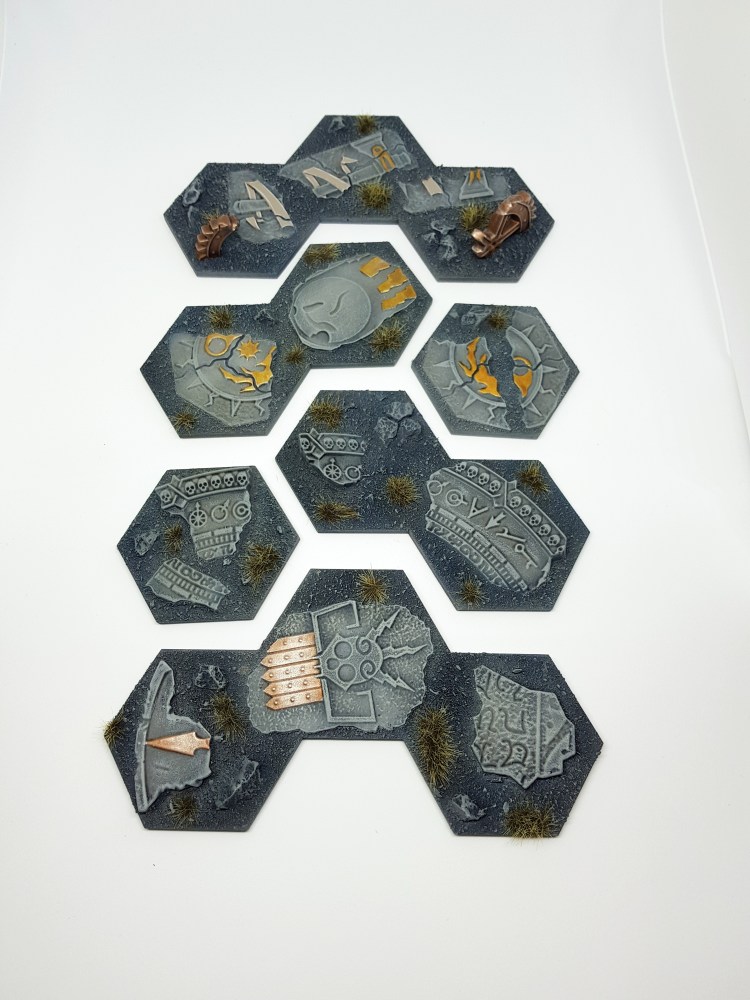
Not too bad if I do say so myself. A little bit of effort but definitely something worth the time. They’re tough and eye-catching. Noticeable when used in-game as well as easy to store and transport, perfect for my needs as all 6 pieces fit snugly into my Shadespire carry case.
All in all the hexes costed me about £14 altogether excluding the price for paints and hobby materials. Amazing value considering I got 6 terrain pieces out of it all. The cost goes up a bit if you buy the full AoS large basing kit but once again, you can always find ways to use the left over parts in the rest of your miniatures collection.
I do plan on doing another terrain tutorial using the Azyrite Ruins from GW but that is for a far later date. Until then, stay fancy with your terrain and always remember to roll crits 😉

These look really cool. I would like to make a load that fit together somehow for making flexible campaign maps. GW made a load a while back but I didn’t know until they were out of production. I suppose rather than getting ones that slot together some how I co uld just make a map and then take a photo of it. Maybe I’ll revisit the idea when everyone’s kids are old enough to allow us to even play one game, never mind a campaign…
LikeLiked by 1 person
Thanks! A campaign map for Shadespire or general GW games? I miss those plastic campaign hexes however
LikeLike
I think they did some for fantasy and 40k… So this would have been pre AoS, maybe 5 years ago or so? I really like the idea of building a campaign map on hexes ans then playing through on it. Different rules and and map types for the different hexes. I just like game design though so this may be something i never realise or i create and never use!
LikeLike