Kill Team Tac Ops tactica and guide!
Welcome to another Warhammer 40,000 Kill Team article! Today I’m talking all about Tac Ops, going from ratings to what you should pick. This is my first tactica piece for Kill Team and it’s based off my experience with the game as well as at physical tournaments across a number of different kill teams.
If you prefer, I’ve done this as a YouTube video which you can check out here:
What Are Tac Ops?

Tac Ops are basically secondary objectives for Kill Team, comparable to how they work in 9th edition of Warhammer 40,000. They are used in matched play and narrative play. When playing in matched play, Tac Ops help you win by letting you score up to 6 victory points (VPs) from them. When you can only score a maximum of 12 points for your VPs, Tac Ops can basically determine who is the winner.
Another aside for matched play events, Tac Ops generally become the first deciding factor for tie breakers. For example, at the recent Games Workshop event at Warhammer World, rankings were dictated by wins then Tac Ops scored. So, to summarise, Tac Ops are crucial to you doing well in Kill Team. Especially considering how a lot of them are generally harder to score consistently when compared to primary mission objectives.
Tac Ops can be secret or public knowledge. By this I mean Tac Ops are either revealed during the strategy phase at the target reveal step or when they are scored. This can allow for mind games as if a Tac Op isn’t revealed yet, is that because you are waiting for a better turn to reveal it on or is it because it’s a secret trigger Tac Op? Mind games basically. Scoring Tac Ops is important, but having the knowledge to deny Tac Op scoring is more crucial.
Picking Tac Ops
When it comes to selecting Tac Ops, your selection is based on what Tac Op archetypes is available to your kill team/fire teams. These are broken down into 4 different archetypes which I’ll cover shortly. Each archetype has 6 Tac Ops which you select as written in the core rule book (draw 2, discard 1 until you have 3 Tac Ops). Selecting your archetype is hugely important because it requires synching with the mission you are playing as well as what you are facing and whether your kill team can actually score them. You’re also not locked into a Tac Op archetype for a tournament, meaning you can switch around them depending on the mission and opponent. Although, you still cannot mix and match Tac Ops from different archetypes.
Outside of this, factions designed for Kill Team have 3 faction Tac Ops you can select instead of 3 from your chosen archetype. These are broad and designed specifically for each kill team, however, a big factor in their use is how faction Tac Ops can swap out “bad” Tac Ops in a chosen archetype to increase your chances of drawing the actual Tac Ops you want to use.
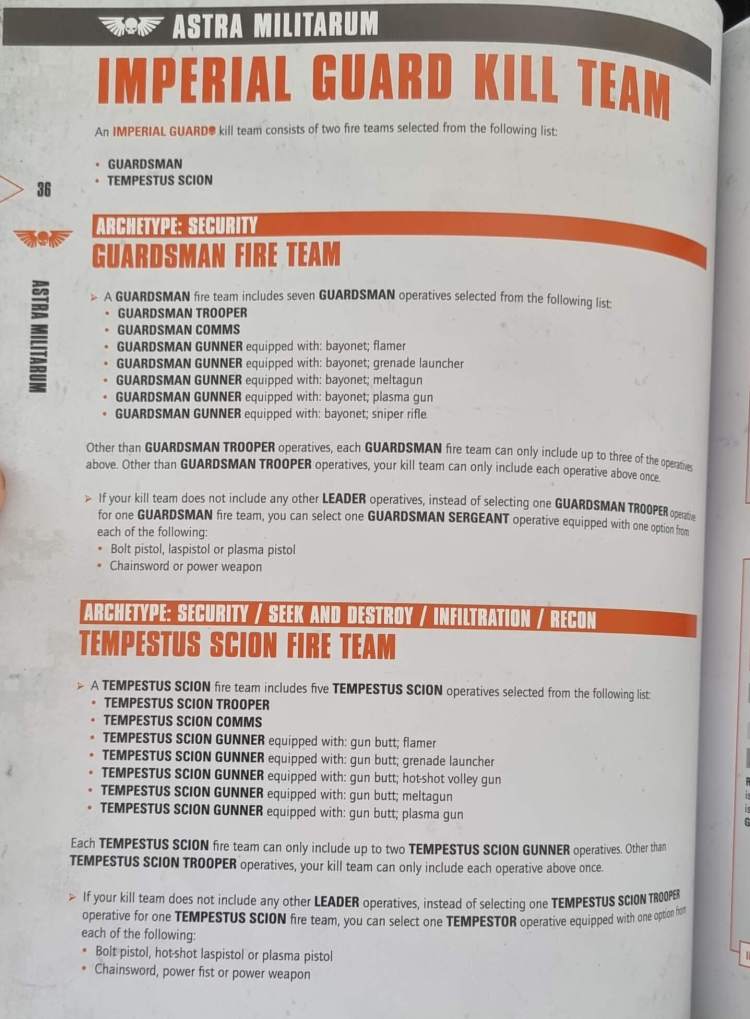
Finally, the biggest factor in picking Tac Ops is selecting those which are not normally usable by your chosen fire team. This applies mainly to factions from the Kill Team Compendium book. How this works is some factions let you make a kill team from 2 fire teams. A lot of fire teams have different archetypes to choose from, which can allow a fire team to use an archetype that normally would not be available to them if you doubled-up on the same fire team.
For example, if you picked a Genestealer fire team (locked into Seek and Destroy or Infiltrate) and a Tyranid Swarm fire team (Seek and Destroy, Security, Recon), your Genestealers now have access to Security and Recon which they wouldn’t normally be able to use. Doing so now gives you more options to play with as a lot of Tac Op archetypes are sort of balanced based on what fire team can normally pick them. As Genestealers with Security allows you to play more defensively than you generally would and force your opponent to engage you instead.
Seek and Destroy
Seek and Destroy is basically the killing archetype. This Tac Op archetype rewards you for killing, whether it be near or afar. It’s simple to play but also to play around.

Head Hunter is revealed when you incapacitate an enemy leader. It grants you 1 VP and then another 1VP if you completed it within the first or second turning point.
It’s actually very easy to complete and max out, especially for shooting kill teams. Head Hunter can also force your opponent to play more defensively with their leader if they know you’re playing Seek and Destroy which is even more beneficial to you.
Rating: 4/5

Challenge is revealed during the first turning point where you nominate a friendly operative and an enemy operative. If your operative incapacitates the enemy operative, gain 1 VP, if it does that while within red of that enemy operative, score another 1 VP.
Once again better for ranged operatives but really hard to max out even then. It causes a lot of mind games but Challenge is both good and bad overall.
Rating: 3/5

Rout is revealed during any turning point. If you incapacitate an enemy operative with a friendly operative who is within red of the opponent’s drop zone, you get 1 VP. If you achieve this condition again in a later turning point, score another 1 VP.
This is definitely more melee focused but aggressive ranged fighters can still score this. Remember, it’s YOUR operative that has to be within range of the drop zone, not the opponent. I like Rout for strong aggressive kill teams as it is a perfect fit for them, especially when contesting objectives.
Rating: 4/5

Execution is only revealed at the end of a turning point where more enemy operatives were incapacitated when compared to friendly. Complete this condition during 2 or more turning points for 1 VP, then 3 or more for 2 VP.
This is actually quite difficult to trigger, let alone score. Execution favours elite kill teams but at times, even they can struggle to score this. I would have preferred this Tac Op if you could at least just reveal it normally instead.
Rating: 2/5
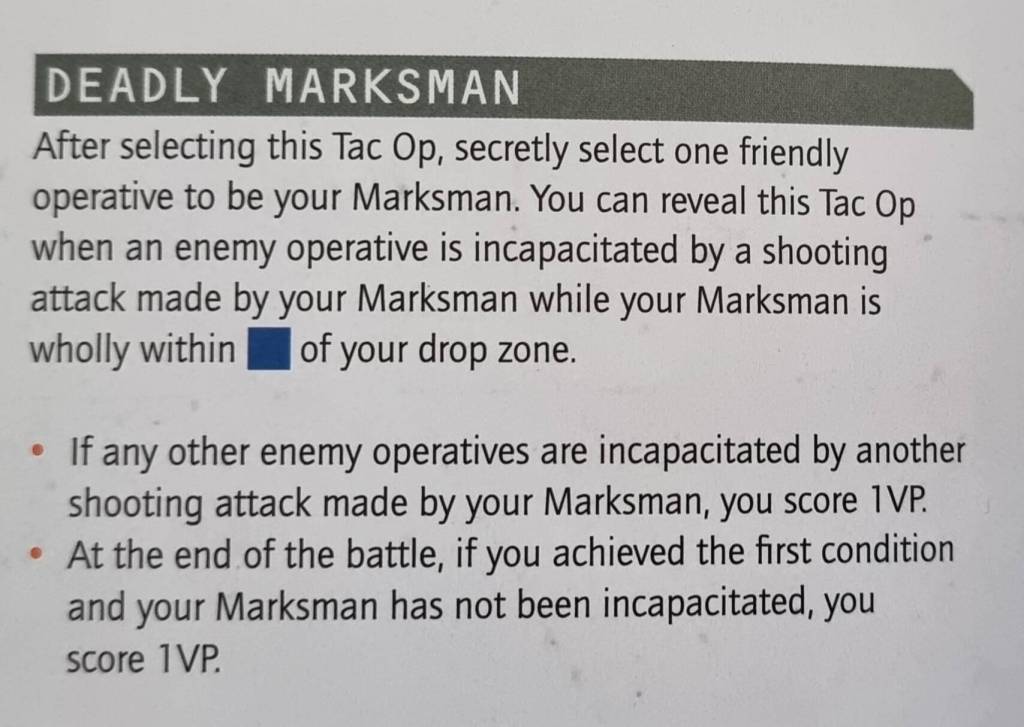
Deadly Marksman has you secretly nominate a friendly operative to be your Marksman. You can only reveal this Tac Op when your Marksman incapacitates an enemy operative while you are wholly within blue of your deployment zone. Then you score 1 VP when your Marksman incapacitates another enemy operative with a shooting attack. If your Marksman has not been incapacitated by the end of the game, score another VP.
This is just rough. Once again, a restrictive reveal condition that requires you to hang back in your drop zone. This is fine but good table setups should have all defensible vantage points and terrain pieces outside of your deployment. You’re also locked into shooting attacks and Deadly Marksman is just difficult to max out.
Rating: 2/5

Rob and Ransack, the mis-printed Tac Op card. Reveal when an enemy operative is incapacitated by a friendly operative while within black and your friendly operative is more than blue from other enemy operatives. This scores you 1 VP. If that friendly operative has not been incapacitated by the end of the game, score another 1 VP.
Overall, while locked to melee operatives, Rob and Ransack is actually pretty easy to score, although difficult to max out. This Tac Op is scored easier later in the game, which can be either a pro or con depending on how you view it.
Rating: 3/5
Overall, Seek and Destroy is good on paper and rewards aggressive play. However, I find that while you can have the same operative score multiple of the Tac Ops, you’re locked into that and lose a lot of flexibility. Not only that but opponents can play more defensively against Tac Ops like challenge and effectively deny you from maxing it out. Smart opponents can just run away while still winning on the primary. Does this mean Seek and Destroy is bad? No. It is balanced but definitely not the best archetype to use. Especially against experienced opponents.
Security
Security is the more defensive archetype. It rewards you for holding and protecting ground. Simple but you must watch out for aggressive counterplay.

Seize Ground is revealed during the first turning point. Select a single terrain piece with the heavy trait more than blue from your drop zone. Score 1 VP at the end of the game for having more friendly APL within black of the terrain feature than the opponent. Score another 1 VP if there are no enemy operatives within black of the terrain feature and the total APL of friendly operatives within black is 4 or more.
As an endgame Tac Op, Seize Ground will generally force you into the opponent’s half. It’s not bad with decent counter play but scoring it depends on how well you game goes overall.
Rating: 3/5

Hold The Line is revealed during any turning point outside of the first. Score 1 VP at the end of a turning point if there are no enemy operatives within red of your drop zone. Complete this in another turning point for 1 VP.
This is quite difficult as you only have 3 turning points to score Hold the Line. If you can somehow keep the opponent away from your drop zone, then sure but a good opponent should be applying the pressure to get close to you. However, Hold the Line is far more effective with heavily distanced drop zones or strong melee kill teams.
Rating: 2/5
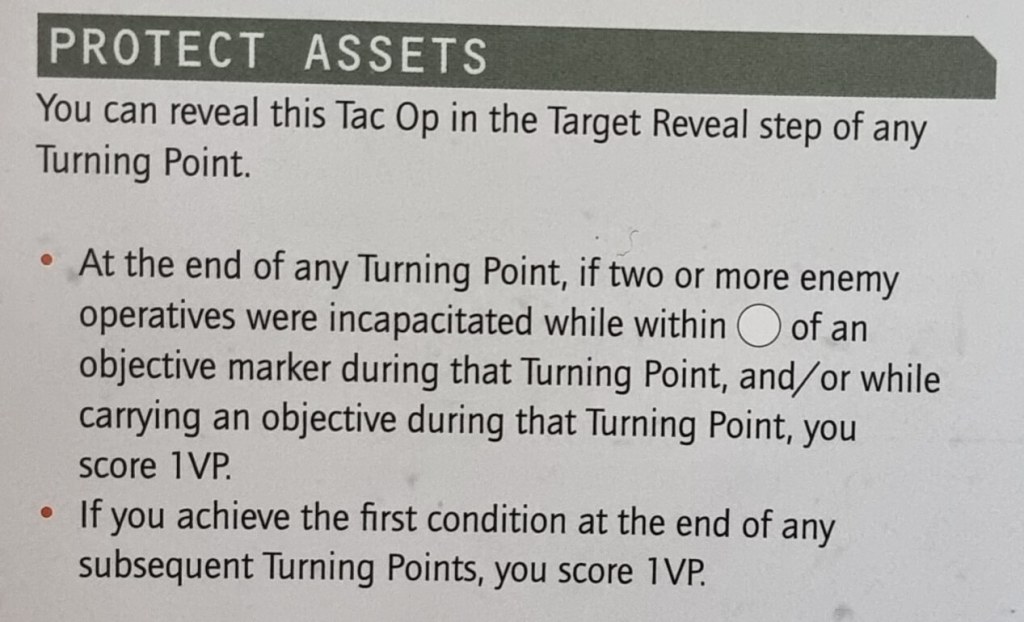
Protect Assets is revealed during any turning point. Score 1 VP for incapacitating 2 or more enemy operatives within white of an objective marker or carrying it that turning point. Do this in another turning point for a second 1 VP.
I think protect assets is great. Your opponent has to be on the objectives so you’ll be naturally scoring this anyway. The only drawback is against elite kill teams of 3 to 4 operatives but that is the only real downside of Protect Assets.
Rating: 4/5

Damage Limitation is revealed in any turning point outside of the first. If no friendly operatives are incapacitated that turning point, score 1 VP. Do it again in another turning point for 1 VP.
Only good in elite kill teams and even then Damage Limitation is a struggle. Once again you only have 3 turning points to score this and making sure no friendly operatives are incapacitated is rough even for the most elite of kill teams due to how damage works now.
Rating: 1/5

Plant Banner has you secretly note a friendly operative to be carrying your Banner Token. You reveal this Tac Op whenever you drop the Banner Token. Once done so, any friendly operative can do the pick up action on it. Score 1 VP if the Banner Token is within red of the enemy drop zone but not wholly within. Score 2 VP instead if wholly within your opponent’s drop zone. Enemy operatives can also destroy your banner for 1 AP if within black of the Banner Token while none of your operatives are within white.
I oddly really like Plant Banner. At first I was turned off by it but you can basically keep it secret until the end of the game and score 2 VP from it. Even if the carrier dies, another friendly operative can pick it up plus dropping the banner is free! So do it at the start or end of an activation. Requires movement and slight trickery, but well worth it for a late-game 2 VP.
Rating: 4/5

Central Control is revealed during any turning point. At the end of a turning point, if you have more friendly APL within blue of the centre of the killzone you score 1 VP. Do this again in any other turning point for another 1 VP.
Once again, you should be doing this in general, especially on missions with a central objective marker. Easy and beneficial to score. The only downside is for super elite kill teams but even then, you don’t have to spend 4 turning points in the middle of the board to score Central Control.
Rating: 5/5
Security is an amazing Tac Op archetype which has only grown on me more with time. Half of its Tac Ops reward you for just playing the game and punish the opponent for staying away. You only have 1 real dud of a Tac Op in Damage Limitation but, in return, you have so many other good Tac Ops to select from.
Infiltration
Infiltration is interesting as it doesn’t really tie into mission objectives, instead making you do things in-tandem to playing the game normally.

Capture Hostage and Infiltrate is revealed when you incapacitate an enemy operative within white of one of your’s who is also more than red away from other enemy operatives. Then remove that friendly operative from the game for 1 VP and score another 1 VP if you complete this Tac Op during turning point 3 or 4.
I’m torn on this, I like the late scoring aspect of Capture Hostage and Infiltrate but losing an operative for this is a steep cost, even towards the end of the game. Good if you’re steaming ahead or outnumber the foe, but bad for the opposite reasons.
Rating: 2/5

Behind Enemy Lines is revealed during any turning point. If 1 or more friendly operatives are wholly within your opponent’s drop zone AND more than blue from enemy operatives, score 1 VP. Score another 1 VP if you repeat this condition during any other turning point.
Unless your kill team has access to mobility or redeployment abilities, Behind Enemy Lines is a tough Tac Op to score. You’re, once again, effectively throwing away an operative to score this and that doesn’t seem like a good idea when you need to contest the objectives.
Rating: 2/5

Upload Viral Code is revealed during any turning point. If a friendly operative performs the upload viral code action, score 1 VP. Do this in any other turning point for another 1 VP. Upload viral code is a 2AP action that can be performed while within red of your opponent’s drop zone and not within white of any enemy operatives.
If you’re fast, have 3 or more APL and the bodies to perform upload viral code, then this Tac Op is fine. Otherwise you’re going to be in a rough spot. Hard to see anyone score this consistently outside of Spacemarines.
Rating: 2/5
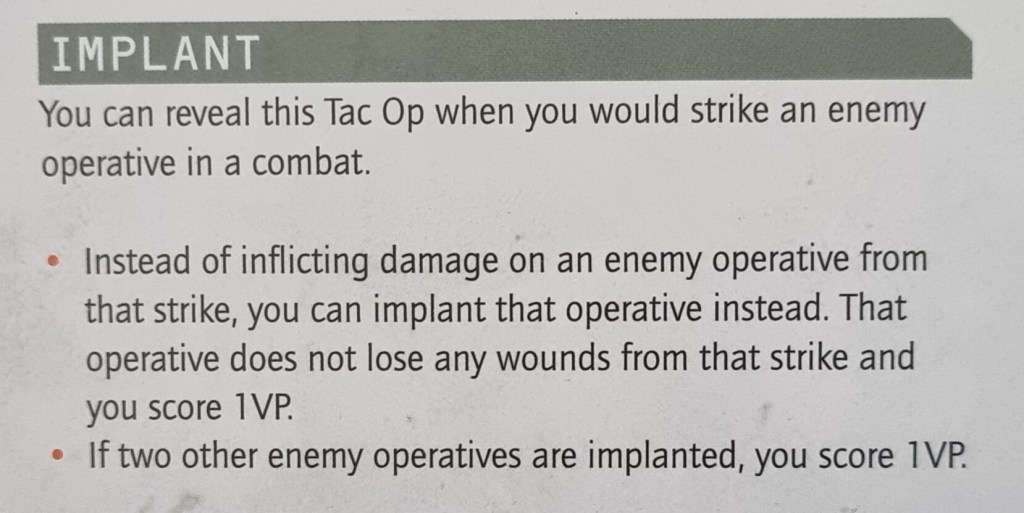
Implant is revealed when you strike an opponent in combat. Instead of inflicting damage to an enemy operative with a strike, you can implant them instead and do no damage but gain 1 VP. Implant 2 other enemy operatives for 1 VP.
This is actually pretty good for any melee kill team. Great when used on 4/5 attack operatives that have already guaranteed a kill and have spare strikes to use. Not super easy to score but the surprise factor is nice as well.
Rating: 3/5

Sabotage is revealed during any turning point. Perform sabotage for 1 VP on a terrain feature. Do this again on another terrain feature (even during the same turning point) for 1 VP. Sabotage is a 2AP action you can do while within black of a heavy trait terrain feature that is within or wholly within red of the enemy drop zone. You still have to be more than white away from the enemy.
The same points as Upload Viral Code apply here. The good thing is you can max out Sabotage in a single turning point but it’s still quite restrictive overall.
Rating: 2/5
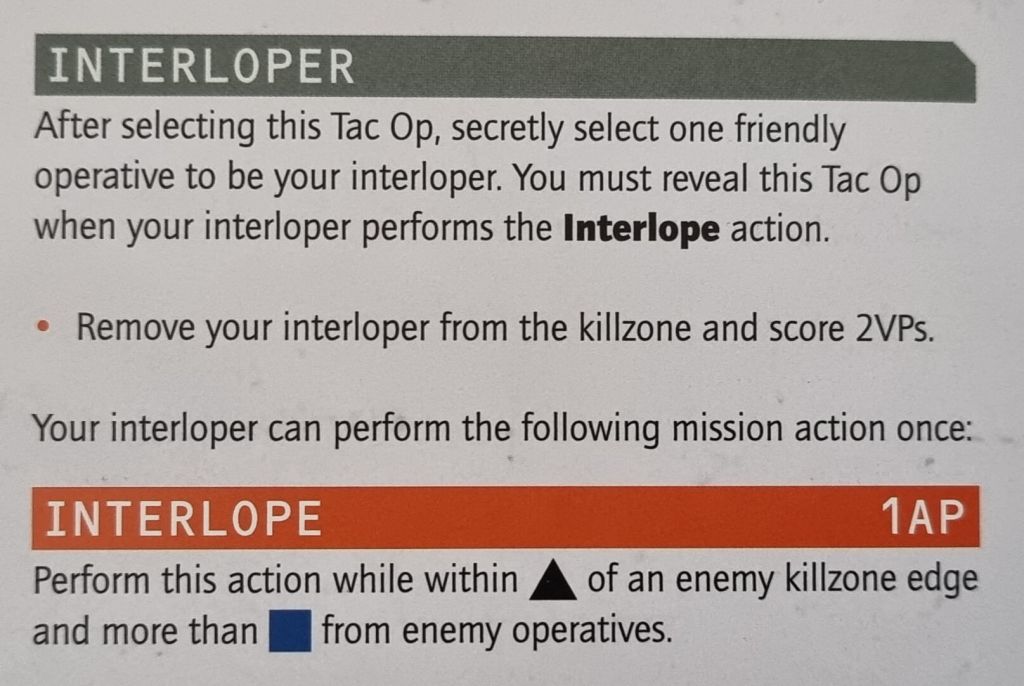
Interloper is revealed when you perform the interlope action. You have to secretly note one of your operatives to be the interloper. The interlope action is 1AP and can only be performed while within 1 black the enemy killzone edge and more than blue from enemy operatives.
The only downside is you have to designate your interloper before the game begins, if it was any friendly operative then I would have liked this much more. You’re also effectively throwing away an operative for 2 VP. Great if you have excess bodies to throw away but once again, you’re losing an operative that can fight over the points. Although this is great to use on a wounded operative that has killed their way to the edge.
Rating: 3/5
Infiltration is a weird Tac Op archetype. I like it, but all its Tac Ops force you to do other stuff instead of playing with the game mission. To play Infiltration well you need a mix of bodies, mobility and high APL. That’s just a lot to ask of, especially when you are looking for maximum efficiency in your Tac Ops.
Recon
Recon works out in a similar vein to Infiltration, rewarding you for battlefield control and holding areas of the killzone.

Mark Target is revealed when you perform a shoot action. When shooting an enemy leader, you complete the shoot action as normal but do no damage instead and score 1 VP if you would have successfully scored damage. Do this again in another turning point for 1 more VP.
This is great for kill teams with lots of disposable shooting. However, I find you often want leaders dead ASAP, so leaving potential kills is going to be a choice you need to evaluate.
Rating: 3/5
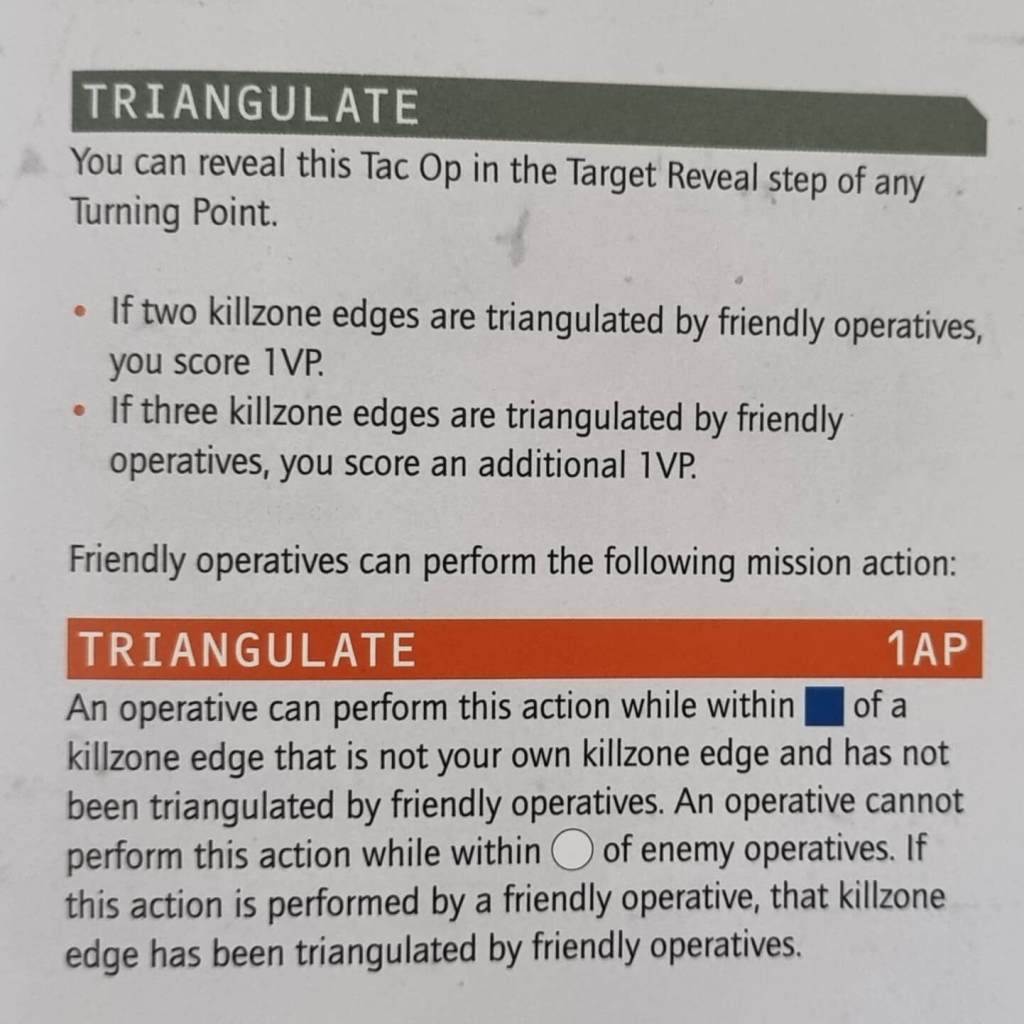
Triangulate is revealed during any turning point. Triangulate 2 killzone edges for 1 VP, do 3 for another 1 VP. Triangulate is 1 AP for performing while within blue of a killzone edge that is not your own and has not already been triangulated. You cannot do this while within white of the enemy.
This Tac Ops is actually pretty easy to max out. Turning point one you can triangulate 2 killzone edges, then leave the 3rd for later in the game as you naturally advance. Triangulate being only 1AP is a great boon too.
Rating: 4/5
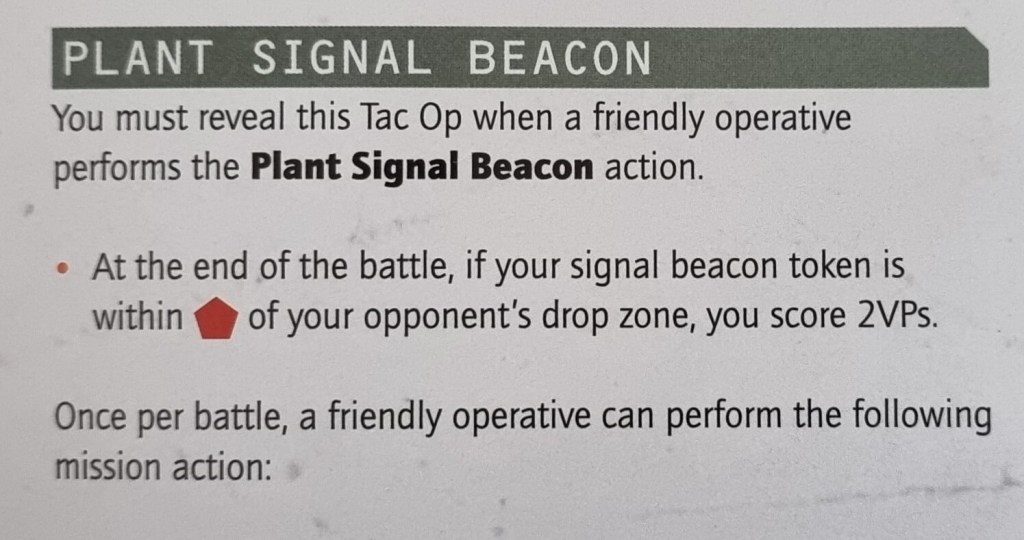
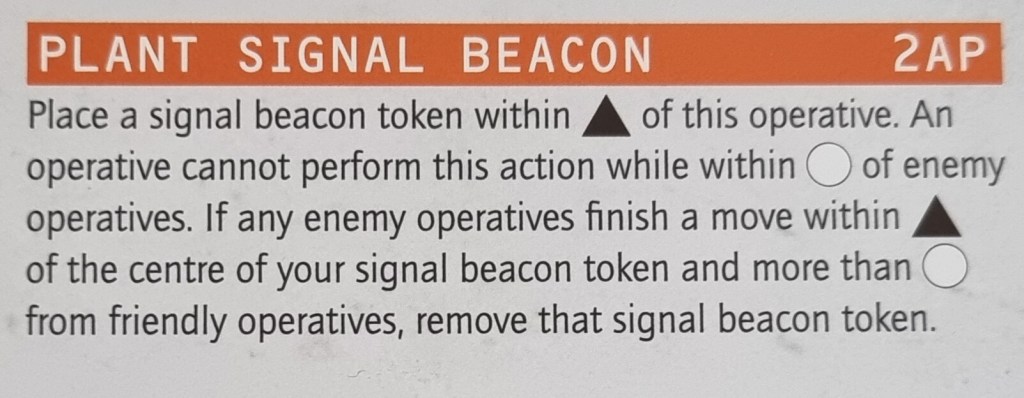
Plant Signal Beacon is revealed when you perform the plant signal beacon action. Score 2 VP if your beacon token is within red of the enemy drop zone. The plant signal beacon action is 2AP performed once per game and has to be placed within black of your operative while not within white of the enemy. If enemy operatives finish a move within black of your token while more than white from friendly operatives, your beacon token is removed.
Again, I really like Plant Signal Beacon. Can be scored late in the game and is difficult for your opponent to interrupt while also having a generous scoring range. 2 AP cost is rough but still a great Tac Op for aggressive players.
Rating: 4/5
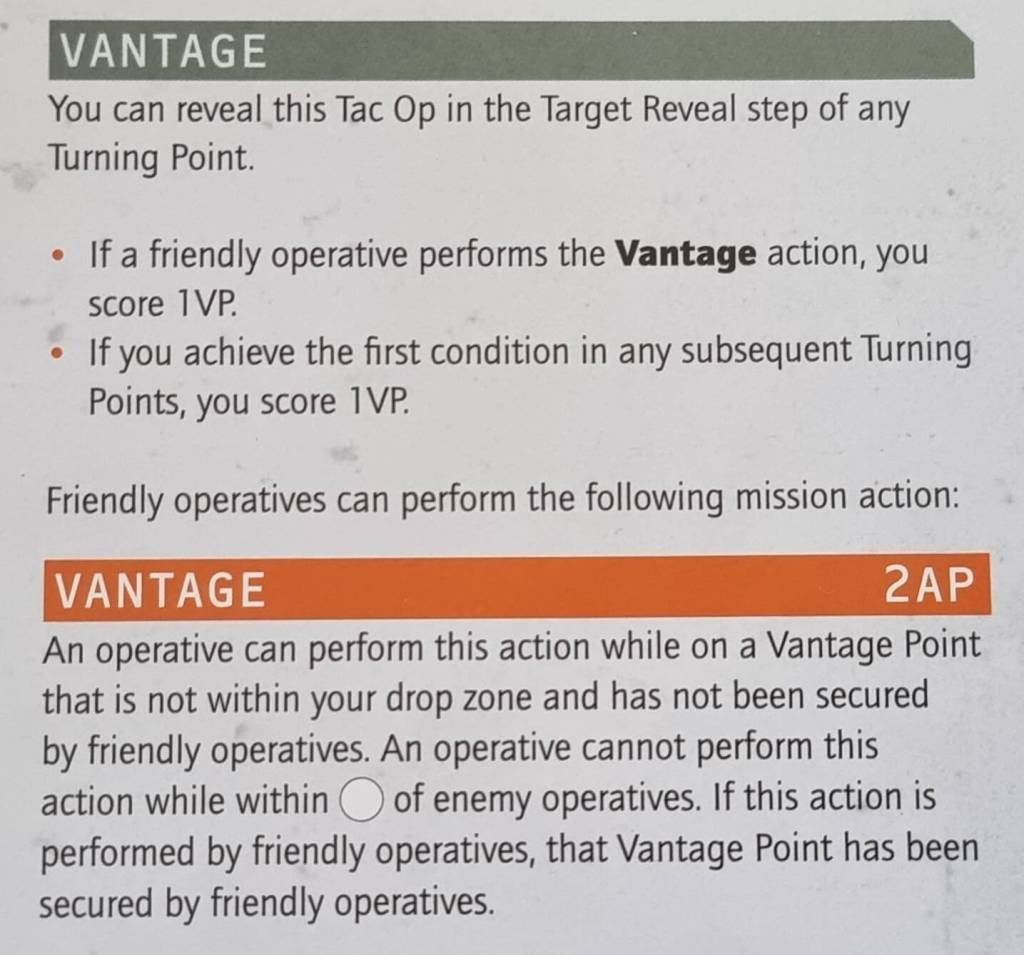
Vantage is revealed during any turning point. If a friendly operative performs the vantage action, score 1 VP. Do this in any other turning point for 1 VP. Vantage is a 2AP action which you can perform while on a vantage point. You cannot perform this while within white of the opponent and on a vantage point that has had this action performed on it already.
I feel this Tac Op is great for kill teams with lots of operatives. 2AP is a steep cost but if you were going to shoot with a lasgun or spending time to get a weak melee operative into position etc then it’s not such a big loss.
Rating: 3/5.

Retrieval is revealed during the first turning point. Your opponent gets to place a Retrieval token anywhere in the killzone that is not a vantage point and not on or wholly within blue of their drop zone. Only friendly operatives can perform the pick up action on the Retrieval token. If you control this token, score 1 VP. If it is being carried by a friendly operative, score 1 VP.
I find this Tac Op actually quite reliable to score. Sure, your opponent dictates where it goes but not in such a way that is impossible for you to reach. Generally it will be in the middle of the board and becomes another point your opponent has to defend. Save for scoring in turning point 4 once you’ve maxed out on the primary for a juicy 2 VP.
Rating: 4/5.

Overrun is revealed during any turning point. Have friendly operatives within each quarter of the killzone and more than blue from the centre for 1 VP. Do this again in another turning point for 1 VP.
This is great for aggressive and fast kill teams. The only thing you have to watch out for is when outnumbered and playing on 5 objective missions. Otherwise this is very easy to score and max out, leaving your opponent little chance to stop you outside of trying to kill all your operatives.
Rating: 4/5.
Recon is great for fast kill teams, favouring those who can also field around 10 operatives. It does what Infiltration wants to do but much better. You can still play the primary while also doing the odd Recon Tac Op that either compliments the missions or slightly detracts from it.
Kill Team Tac Ops Overview

With this, I hope you have a better understanding of Tac Ops in relation to Kill Team. They’re a crucial part of the game and the key to winning. While I’ve given ratings to each Tac Op, this can change depending on who you are facing and what kill team you are using. For example, a fast kill team with lots of operatives makes Recon and Infiltration much better whereas a kill team that has good shooting and melee can probably work best from Seek and Destroy. Playing against a slow kill team with minimal operatives? Security is probably your best bet and so on.
There are a lot of factors to consider when it comes to Tac Ops, so my best advice is to just practice and see what works best for you as well as in relation to the mission you are playing. Once again, for Compendium kill teams, remember to manipulate Tac Op archetype selection when you mix fire teams. Giving a fire team access to an archetype that they cannot normally use can lead to powerful beneficial effects for you.
Currently, Security is my favourite and most consistent. I think Seek and Destroy is good but requires you to be too risky and gives your opponent a lot of counterplay. However, I do think Seek and Destroy is great to learn the game with. Recon is another favourite of mine due to its flexibility but it requires you to have a lot of mobility. Infiltration is sadly the worst of the bunch but that’s due to it forcing you to play against the mission with multiple actions that are 2AP.
Closing Crit
So that’s pretty much it with my tactica article on Kill Team Tac Ops. Once again, it’s based off of all my practice and experience at tournaments while playing multiple kill teams. I hope this becomes a useful tool for your own gaming and experience. Let me know if you’d like to see more Kill Team content like this in the future!
Until next time, even in Kill Team, remember you can always roll crits on the sneaky side!


Great article that I often come back to when deep diving Tac Ops. Now it’s four months on, have you changed your views on any of these?
LikeLiked by 1 person
Thanks! Maybe a little bit on Infiltration being slightly better aha
LikeLike