

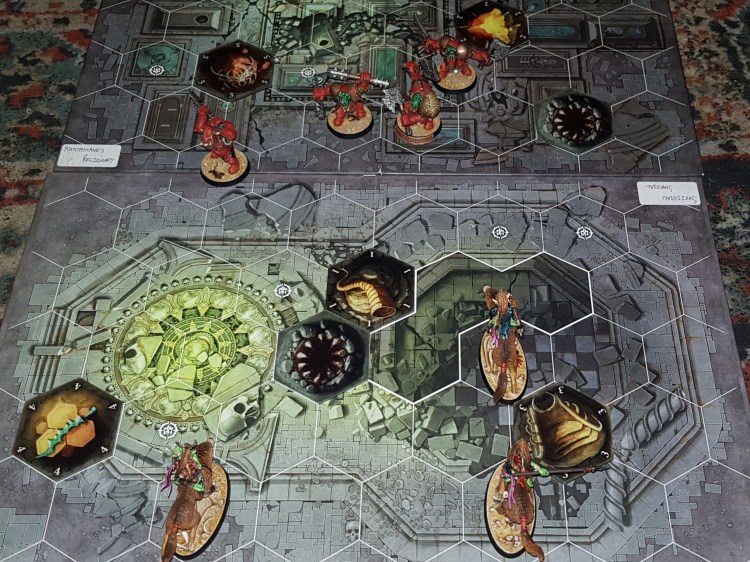
Where those little hexes go is very important.
Greetings and welcome to a brand new tactica article! I’ve been meaning to do this for a while now but unfortunately I’ve had a lot of delays, still, better late than never. Today I’ll be talking about how to correctly place lethal hexes and how to maximise their usage. I’ve spent a long time playing around with this mechanic so it’s time to share my knowledge with the world.
Check out my game boards article here for better understanding of board placement and names.
Placing Lethal Hexes

With Warhammer Underworlds Beastgrave we gained a brand new mechanic: placing lethal hexes. How it works is simple, the person to place the last (5th) objective gets the option to place a lethal hex first, then the other player does the same. There are 2 key important factors here. Firstly you have the OPTION to place, it’s not compulsory so you don’t need to place a lethal hex if you don’t want to. Secondly with organised play you can’t place lethal hexes adjacent to each other, this helps stop really toxic/crazy lethal hex builds (5 bunched lethal hex Molten Shardpit). You’ll need to remember these 2 pointers before going forwards.
Feature Tokens
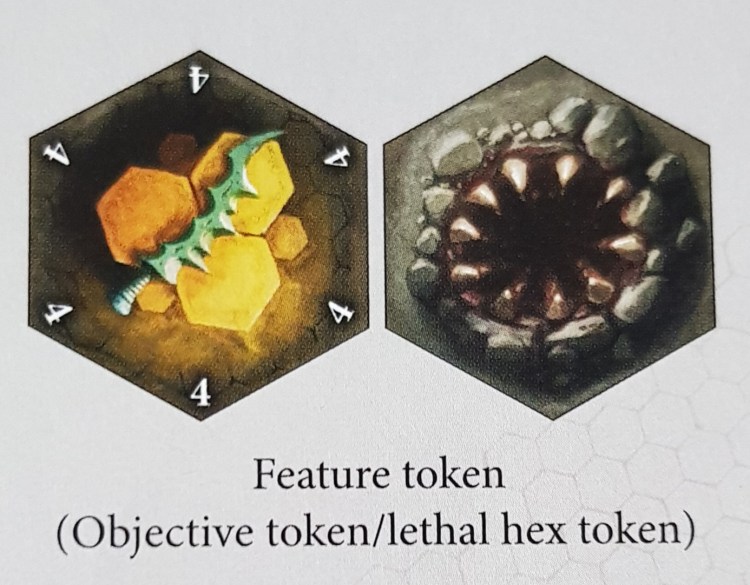
Wait, we’re going back now?? I hear you cry. Well, yes. Feature token placement plays a huge part in where to put lethal hexes. Once again there’s 2 things you can do in regards to feature tokens: punish your opponent for standing on feature tokens and using feature tokens to make “safe” starting hexes for deployment.

Punishing your opponent for standing on feature tokens is easy. Just place a lethal hex behind a feature token so you can drive back the target to their doom. It’s simple, straightforward and this is what most people do. This is the bread and butter.
Using feature tokens to make starting hexes “safe” is a much more difficult but rewarding topic. This is heavily dependent on boards, how you’re deck works in regards to hold objectives and the size of your warband. A common tactic is placing a lethal hex behind an advantageous starting hex for your opponent. This is so that it makes it easier to kill a fighter from deployment or discourage you/the opponent placing a fighter there. Another common tactic is to place a lethal hex in-between 2 adjacent starting hexes so that no matter which fighter is moved first, the other is still at a high risk of going out of action.

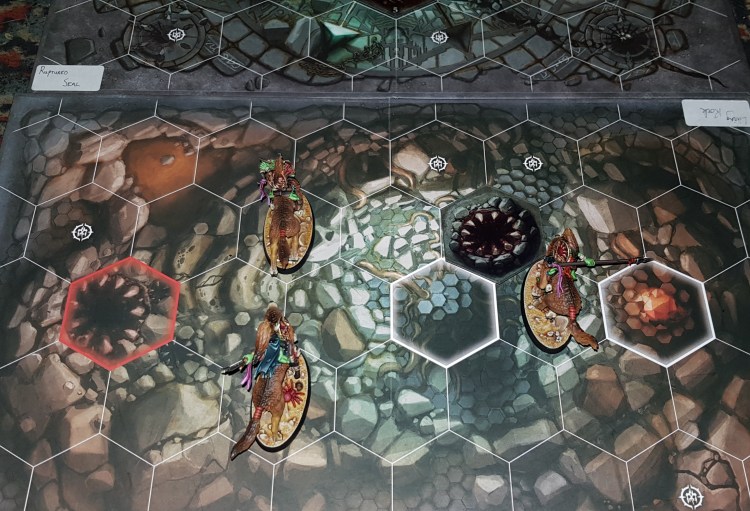
It may seem like a hopeless task but don’t despair dear reader. A simple thing to do is use feature tokens to make a starting hex safe. As pictured above a simple thing to do is place a feature token in the middle behind 2 adjacent starting hexes. What this does is make 1 fighter safe as you generally won’t know where your opponent will place their lethal hex. However now you’ve made 1 fighter safe over making both at risk which is a much better result.
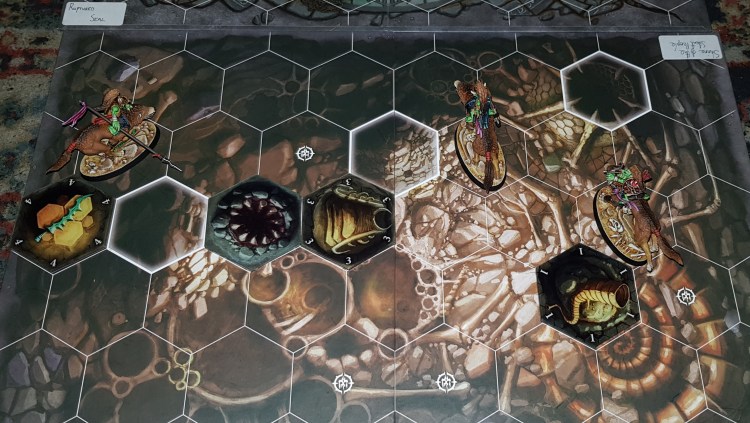
You can also do the same with lone starting hexes depending on the game board. Starting hex adjacent to 1 or more blocked hexes? Place a feature token behind it to block out any lethal hex from being placed behind making your fighter, once again, more likely to survive attacks.

Finally you can use feature tokens to preempt your opponent trying to make starting hexes safe. As you can’t place feature tokens within 2 hexes of each other this creates a 2 hex bubble of denial agaisnt other feature tokens. It’s more difficult but can really mess up your opponent’s plans if pulled off correctly.
Using Lethal Hexes Aggressively

This is pretty simple and covered with feature token placement. It mainly involves placing a lethal hex in enemy territory behind feature tokens or starting hexes. When used against feature tokens you’re making it very risky for your opponent to stand on them as it makes them more likely to die from attack actions (as mentioned earlier in this article). You can also use it against opponents who you feel will play “turtle” control/just keep key fighters back at the edge of the board. Putting a lethal hex in a key corner hex or adjacent to an objective in a corner hex can really mess up your opponent.

Next you have placing them behind close enemy starting hexes. This is very strong if you have less drops than your opponent. They either have to gamble going first with a fighter so far forward or play it safe and deploy further back. It helps you control space more or punish your opponent for setting up there. This is especially strong if you don’t know what your opponent is playing (in regards to playstyle) but you can usually make a fair guess depending on warband choice and how feature tokens are set.
Using Lethal Hexes Defensively
You can also use lethal hexes defensively. This can be done in 2 main ways once again: making chokepoints with board setups and trying to predict where your opponent is going go.
You’ve already seen this most likely, played against it or used it yourself (you monster). You place boards 2nd and in diagonal configuration with a 3 hex gap then place a lethal hex in either of those to make it a nightmare to cross. Combine with the Molten Shardpit board for a truly terrible experience for your opponent. Shuts down aggro heavily and forces your opponent to carefully make their way into your territory. Simple. You can use other boards too but the Molten Shardpit is the most efficient board to use this with.
A more difficult task it’s predicting where you’re opponent is going to go, especially in a best of 3 game for game 1. Generally you place your lethal hex in no man’s land or a hex near the edge of no man’s land in order to pre-empt where the enemy fighters will go. This is especially hard if you’re playing aggro yourself as you’ll be potentially hampering your own fighters when the come to engage the opponent. However if done correctly you can slow your opponent down or force them down different paths into your territory.
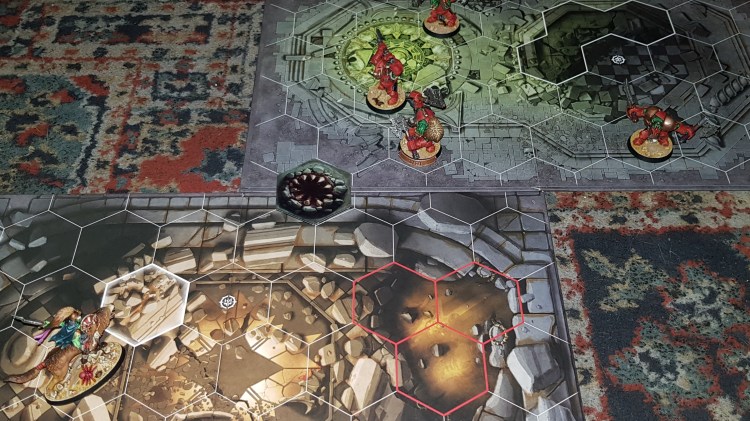
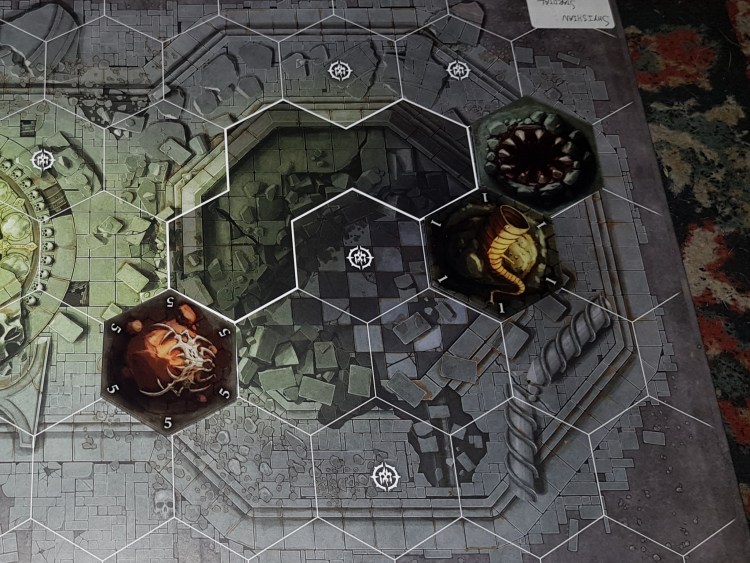
Protecting Objectives

This is brand new tech I developed while I was playing at the January 2020 Warhammer World Grand Clash on the Saturday. At the event it was publicly clarified (at least for the Grand Clash) that Restless Prize can’t push objectives through blocked hexes as it never specifies it can do so in the first place. With this and the fact Restless Prize can’t move objectives through lethal hexes, you can now prevent the opponent from pushing an objective closer to their territory. In the picture above with the Shattered Tower game board, I’ve made a 4 hex wall that the opponent can’t push an objective through. I can’t mitigate losing the objective but I can mitigate making it easier for my opponent to grab it off me.
The Ethereal
Can’t go without mentioning the elephant(s) in the room. Thorns of the Briar Queen and Lady Harrow’s Mournflight ignore lethal hexes entirely. You can play them and not have to worry about lethal hexes much at all, especially in mirror matches. Still you can abuse the protecting objectives tech as I always place a lethal hex with my Mournflight against other ghost warbands, all just to slow down or minimise the effect of Restless Prize. Plus you have to be aware that in games against warbands vulnerable to lethal hexes, your opponent will usually forgo placing a lethal hex meaning you have to be very efficient with the usage of your own.
There you have it, my knowledge all about lethal hex placement. With this you’ll have a better understanding of how to use and combat lethal hex placement. It’s just as important as board placement and involves the same kind of principles: planning your game around them and predicting/ reacting to what your opponent will do/does with lethal hexes. Still a very deep topic that will take quite a lot of games to get a hang of but don’t be daunted as you’ll get there in the end with enough practice, even if crits are no help!
