
Even the city of the dead yields life.
A lot of you may have seen these already but today I’ll be talking about my proxy warband for the Farstriders which I took to the Warhammer World January 2019 Grand Clash. Veteran readers will know I have a history of converting up a warband. I really like the Farstriders but wanted to do my own unique twist on them.
Firstly, as with all my conversions, I did a mental sketch of what I wanted. I narrowed it down to 2 options: Chaos Farstriders or Sylvaneth Farstriders. The Chaos choice was a lot of work and didn’t really appeal to me so I went with the Sylvaneth choice by using Kurnoth Hunters. They’re big, trees and all come with appropriate weapon options.
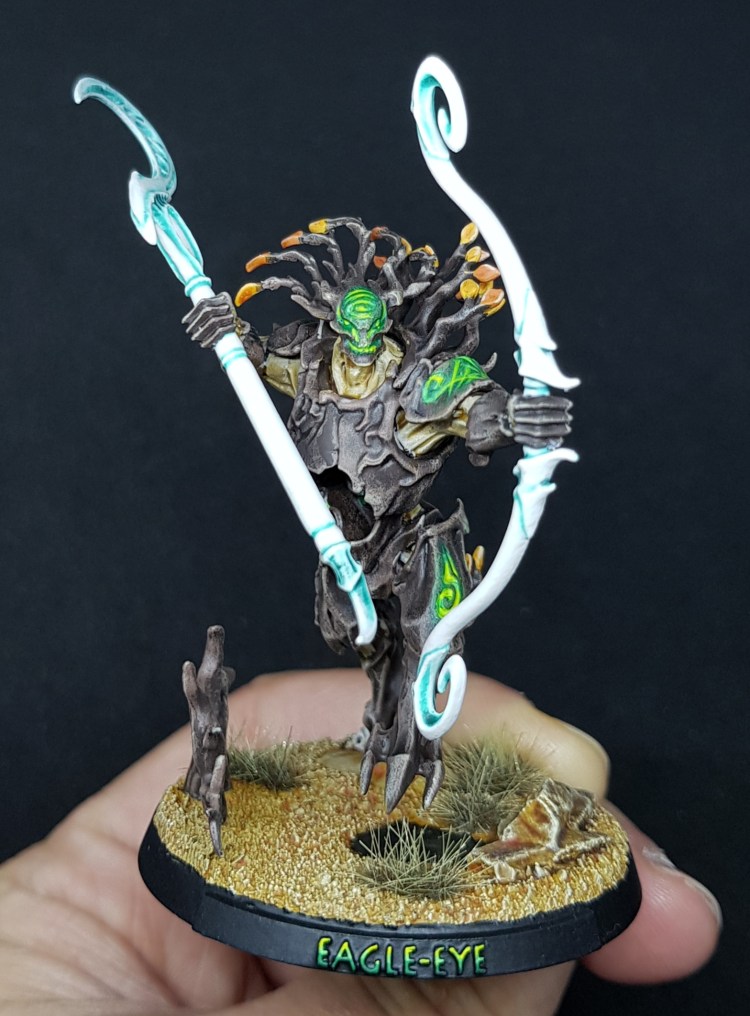
Once I got the kits I simply built each model to look like a member of the Farstriders. For example: the leader only had a bow with 2 Forest Sprites to represent Farstrider’s Starfalcon, a single fighter with a sword and a bow slung over to represent Swift-Blade and finally a guy with a modified scythe and bow to represent Eagle-Eye. To make it all extra clear for my opponent I purchased 3 Versatile Terrain custom name plates which I have done a review on before.
Because I’m silly I forgot to take work in progress (WIP) pictures so I’ll go over how I painted them. I didn’t go as high detail as I usually do but wanted to experiment more with a faster but still good-looking painting technique.
To start off with I airbrush primed the miniatures with Vallejo grey primer. Then I airbrushed the bark with Dryad Bark and washed via the airbrush with Agrax Earthshade. Once dry I drybrushed Dryad Bark, then Gorthor Brown with a light drybrush of Karak Stone as a fine highlight.
My bases were painted with my standard Underworlds basing regime. Painted Zandri Dust, washed Casandora Yellow, big rocks washed with Agrax Earthshade then all highlighted with a drybrush of Ushabti Bone.
The inner bark was basecoated with Rakarth Flesh and washed with Agrax Earthshade. Next it was highlighted with Rakarth Flesh, the Karak Stone and a final highlight of Ushabti Bone.
The Forest Sprites and weapons were basecoated with MANY thin layers of Scale 75 white. I then washed them all with a mix of Lahmium Medium and Nihilakh Oxide. Next I recess shaded with 2 thin coats of Coelia Greenshade and Lahmium Medium to build up a blend. Then I highlighted them with Palid Wych Flesh and finally Scale 75 white.
Leaves were all basecoated in either Jakero Orange or Averland Sunset in a random pattern to show the effect of their leaves slowly dying/ageing. This was all washed with Casandora Yellow. Once dry I highlighted with the appropriate base colour and then highlighted them all with Ushabti Bone to blend them together from afar.
The green runes and eyes were all basecoated with watered down Scale 75 Forest Green. This was applied in 2 thin coats and over a larger area to represent glowing. Next I applied watered down Scale 75 Greenskin Flesh, leaving the darker green showing and applied 2 coats to build up the glow. I did the same with Scale 75 Spring Green and then Yriel Yellow. I appled a green glaze which made it too green so repeated the Spring Green and Yriel Yellow steps again.
Skulls were basecoated with Rakarth Flesh, washed Agrax Earthshade, highlighted with Rakarth Flesh, then Palid Wych Flesh.
The name plates were basecoated with Vallejo black primer and the letters painted in the same way as the runes without the glaze step, all just blended up to yellow.
After that I sealed the miniatures with Vallejo polyurethane gloss varnish via airbrush then did a coat of Vallejo polyurethane matte varnish after a few hours to knock down the gloss. Usually I do oil washes after the gloss coat but I wanted to save time.
The bases also had pools of water. I painted these in my murky technique. This is first by painting Rhinox Hide. Once dry paint on watered down Caliban Green and then watered down Rhinox hide and slightly mix them together. Once I dry I used my super old bottle of Games Workshop Water Effects in 3 thin layers. It’s important to let each layer dry fully before applying the next. Then I just added grass tufts.
Here are the finished results:

Now for some close-ups:


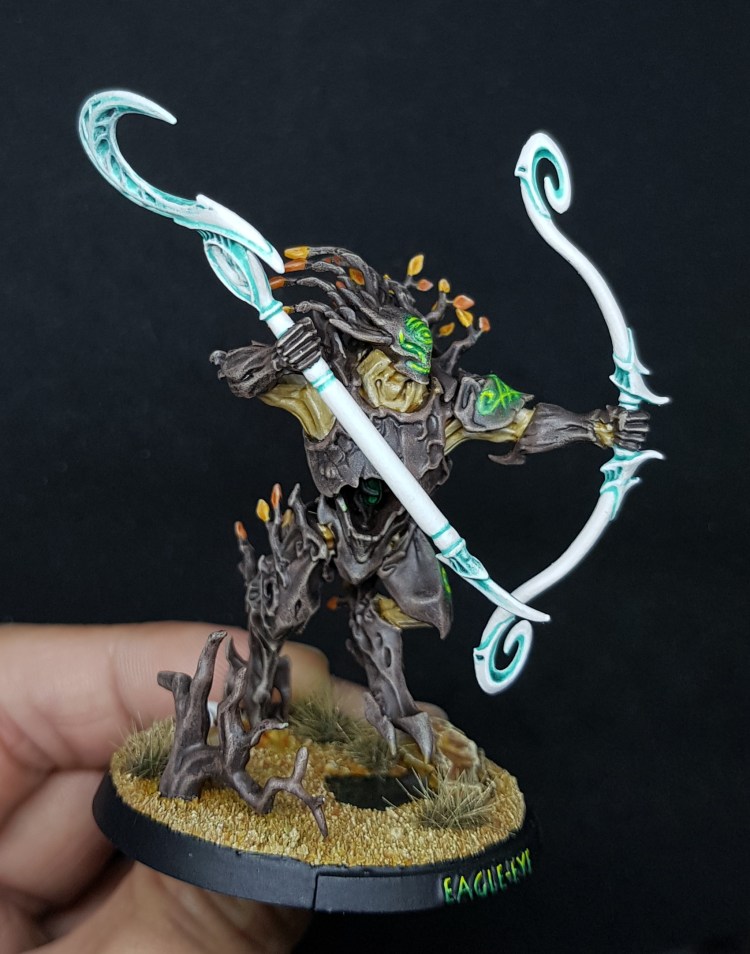

There you have it. I was really happy with how they turned out despite the main work being done with drybrushing. Overall it shows how all forms of painting from drybrushing, airbrushing and standard brush work come together to form an amazing end result. I hope this inspires you to push yourself with your own painting as I feel Underworld miniatures are great for experimenting with new techniques as well as even converting up your own warbands from the Games Workshop range.
While I’ve enjoyed making proxy warbands I’ll be going back to converting the original models or just painting them normally. It was fine but I’ll only go back to making proxy warbands if I stick with another warband for more than 6 months. If you want to show off your own painted warbands, feel free to show me as I always love seeing what colour schemes people come up with. Remember; Painted miniatures always roll more crits 😉

Great job. The conversions are executed very well. You created something unique but made it apparent who is who. Course, those name plates don’t hurt either. You’ve got some create contrast going on as well with the blue/white weapons and the green runes compliment it all nicely.
On a related note, a blogger buddy of mine did a proxy warband using Goblins for Spiteclaw’s Swarm that came out great and you might like: http://objectivesecured.blogspot.com/2019/01/moonclan-grot-warband-completed-snikkit.html
LikeLiked by 1 person
Thanks dude, I tried to match everything with the right colour theory.
Ah those look amazing!
LikeLiked by 1 person